STAUROMEDUSAE UK
An online guide to the Stalked jellyfish (Stauromedusae) found
around the coastal waters of the United Kingdom and Ireland.
Includes notes on their identification, and where and how to find them.
stauromedusae in the field (on the shore)
Many texts describe the UK species as reaching sizes at which they are rarely found, so if one goes out looking for something as large, then one may miss out on finding them at all. There's no doubt that the larger the specimen, the easier it will be to identify in the field. However, most of the specimens found are likely to be around 10mm in diameter or less, it's often easier to look for specimens in the region of 5mm in diameter or less, hoping that larger specimens will also be noticed.
The smallest stauromedusae I have personally found was a Haliclystus octoradiatus that was just 2mm in diameter, and was found with others of a similar size on the brown algae, Cladostephus spongiosus, Hairy sand weed. It is not known how important this algal species is to juvenile stauromedusae, but it seems to provide a suitable nursery. The smaller sizes at which specimens can be found have an obvious bearing on the identification of specimens in the field, and it is sometimes incredibly difficult to identify juveniles in-situ without the necessary equipment. For example, juvenile Haliclystus octoradiatus and Haliclystus auricula may appear to be the same species if their differences cannot be observed. Haliclystus octoradiatus has white nematocysts whilst Haliclystus auricula does not possess any at all. The problem is, in finding nematocysts, which can be hugely difficult in the field because there may be few nematocysts, or the specimen/s may be so small it's difficult to observe any at all.
One method of identifying stauromedusae in the field is to take ''lots'' of high resolution macro images of them using a digital camera. I say lots, because unwanted ones can easily be deleted by using the cameras playback facility. Great patience is often needed in taking shots but the more shots you have, the more chance there will be in getting just the right one that may be needed for determination. Getting shots of a specimen at the right angle or angles needed to gain an identification isn't always easy. For instance, Haliclystus octoradiatus has eight arms, and if a particular specimen only has two nematocysts, and they're found in a single arm, then numerous shots will be needed of the specimen at various angles to accurately determine the specimen because unless the specimen is large it is less likely that any nematocysts will be seen a all. This is the main problem is determining Haliclystus octoradiatus, and many will have been erroneously recorded as Haliclystus auricula in the past.
As a general rule it is good practice to try and take images of the oral face of the bell and the lateral (side) view of bell (images of Calvadosia campanulata). I've found a good angle to try and achieve is a lateral angle, where some of the arms at the furthest part of the oral face and part of the oral face is also in focus. Lateral images can be used to compare the proportion of the stalk to the bell, the lateral colour, the presence of primary tentacles or anchors and their shape. Oral images of the bell will best show the oral colour / colours, number and layout of nematocysts and number of gonadal sacs in mature specimens.
With so many species having a tendency to hang, they don't always naturally present themselves in the best orientation to gain images that are necessary for identification. This often means that specimens will have to be moved slightly or the specimens staged to give the best views. Specimens are easily staged by either, changing the angle of the algae they're on, by moving it into the desired position by using another piece of algae to hold it in position, or by supporting the bell in some way, usually with a piece of algae, Chondrus crispus is good for the purpose as its framework of stiff forking fronds can be used as scaffolding.
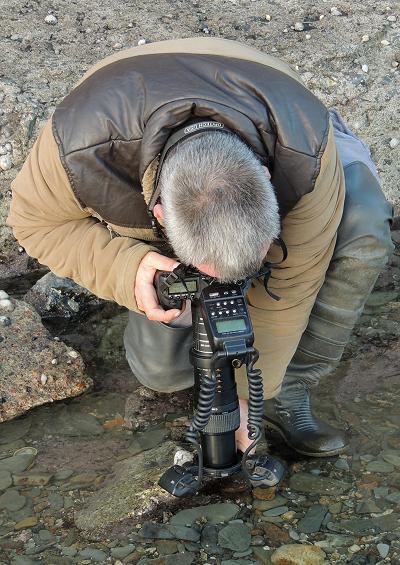
I use three cameras to photograph stauromedusae and all have been used in producing this website. The majority of images used here are taken with either a Pentax WG-III digital compact underwater / shockproof camera or a Canon 550D DSLR camera with a Sigma DG EX 150mm Macro lens; both of these are used for identification in the field, not all at the same time I might add. Here I will describe how I use the Pentax WG-III digital compact on the shore, it's a camera within most peoples budget, and a type of camera that is more likely to be used or useful to people recording on the shore.
Once I find a specimen I find it best to take a few images of it in quick succession for numerous reasons; rockpools can silt up quite quickly, and of course it's all too easy to get distracted, lose sight of something, and not be able to find it again.
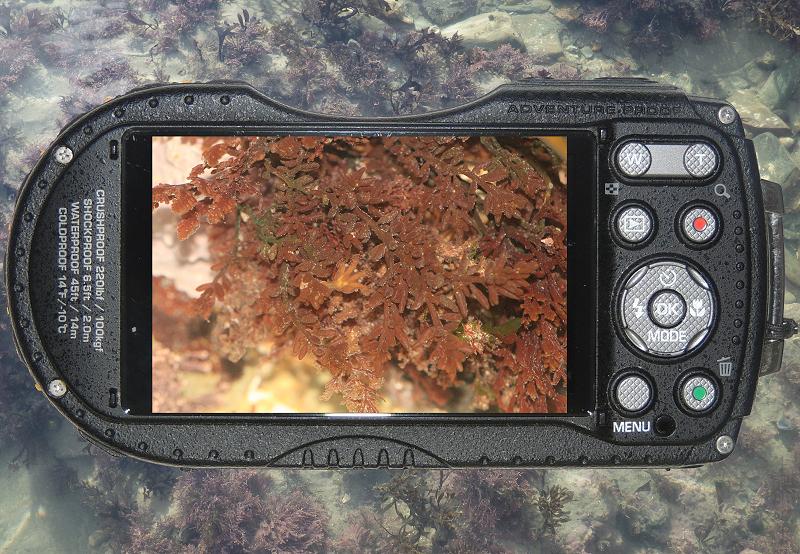
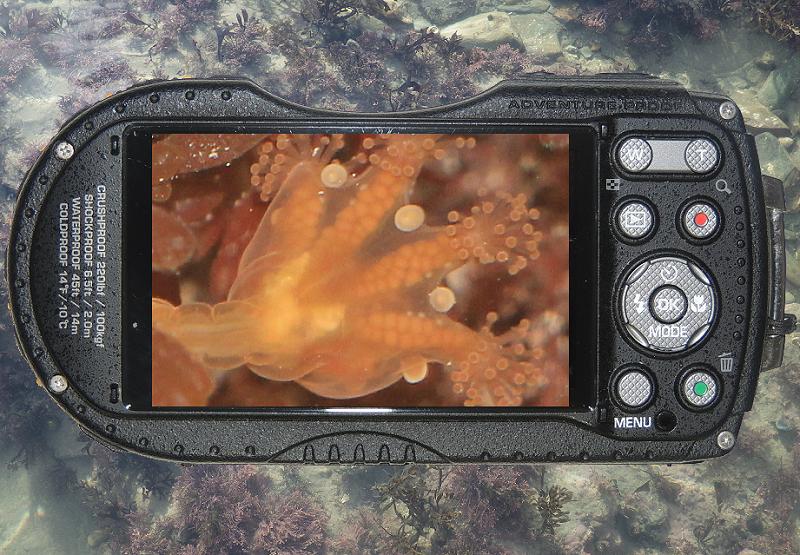
Once these initial images have been taken, I have a look at them, using the PLAYBACK function of the camera. I check they are in focus, and if they appear in focus, I zoom in, and see if it is possible to identify the specimen. With a little bit of luck it's quite possible for a specimen to be identified quickly and in the first few shots, especially if someone has images on hand to make comparison with. These might have already been placed on the camera being used or placed on a mobile device, having been downloaded from this website!
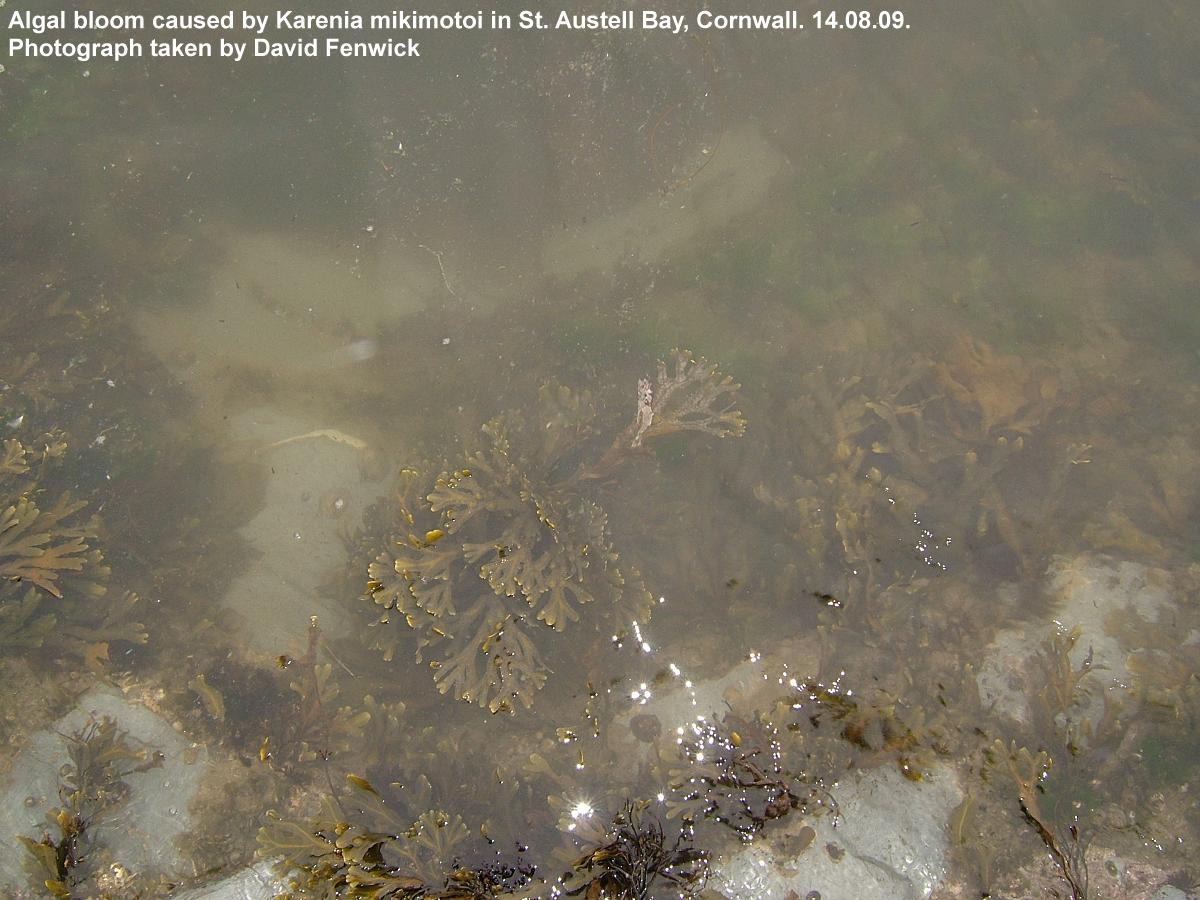
If however the detail in the images is poor or specimen out of focus when looked at when zoomed in, then it may well be that the camera needs to be closer to the specimen when taking shots, so more detail can be observed. Making sure that if a non-waterproof camera is used that it is kept far enough about the water surface as not to get wet. Clarity of water, salinity and the depth of specimen under the water, all play an important part in the ability to take clear images in rockpools. Where conditions are poor it may be necessary to try and move the algae the specimen is attached to closer to the waters surface to best observe any detail, and especially if the water is silty or coloured e.g. by sediment or algal bloom, as this can not only obscure features, it can create them. In windy conditions where there are too many ripples on the water, the only successful way of finding and photographing stauromedusae is with and through a glass-bottomed bucket, or through the base of an old fish tank or clear plastic container.
Essentially, with the photographic process being a little ''time consuming'', speed is of the essence, so taking images, playing them back, zooming in on PLAYBACK, assessing the images, changing the angle of the specimen and repeating the photographic process until your either sure of an identification or sure an identification can be made later using the images taken, is the best way proceed in getting a specimen identified.
Only if the specimen is a particularly good specimen or unusual specimen do I personally spend time in photographing the oral and lateral faces of the bell, I do just enough to identify the specimen and move on. Sometimes I take an image to reminder myself of the species seen, or an image of each of the specimens seen, so as to be able to record numbers more accurately. Taking images of lots of different specimens also shows how variable certain species can be. Experience and confidence are key factors in identifying stauromedusae and I'm glad to say there's not may of them, a couple species do need careful examination, but I would be confident of most people being able to identify them with a little practice. The key to recording stauromedusae is to photograph, identify, move on, find another specimen, and repeating the process, and to maximize the time spent searching for them. If unsure of any identification it is well worth spending a little more time being patient and getting good images of oral and lateral faces of the bell, where possible. The more you see the more confident you'll become and the less you'll rely on the camera.
It must be said that images viewed and enlarged on the PC will most likely reveal other determining features that might have been missed on viewing a specimen on a small camera view screen.
Identification of juvenile stauromedusae and use of
super-macro lens in photographing stauromedusae.
The identification of juvenile stauromedusae is best done by viewing with a microscope or camera with a super-macro lens.
Images can be taken by attaching a camera to a microscope eyepiece using a photo tube attachment. Digital / USB eyepieces can also be used to take images through the microscope, but the more affordable ones usually offer a much lower resolution and refresh rate than a standard digital compact camera, and to be quite honest, some of the ones found on Ebay are pretty much useless, so beware. You can get better photographic results by simply holding a digital compact camera over a microscope eyepiece.
Perhaps the best way of taking photographs of juvenile stauromedusae and detailed anatomical images of stauromedusae is by using a DSLR camera fitted with a "super-macro" lens, a lens such as the Canon MP-E 65mm. There are limitations, but such a camera setup has the advantage that it can be used both in the lab., at home or in the field. The main limitation is that, on the shore, images can only be taken of specimens found close to the surface of a pool and because of the short focal distance of the lens.
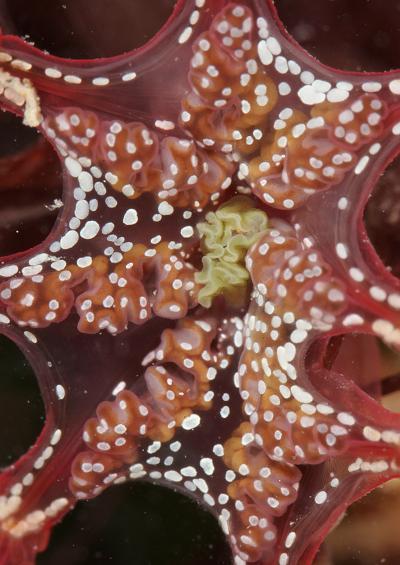
The images at the foot of this page of Calvadosia cruxmelitensis, were taken at home using a full frame Canon 5D MkII DSLR camera, MP-E 65mm lens, MT-24EX Twin Flash, a full set of Kenko extension tubes and 1.4x Kenko TelePlus Pro 300 teleconverter. The setup is best used on a stand, here an old photographic enlarger has been adapted for the purpose, focusing is manual, using the enlarger stand. The advantage of this setup is that any form of camera shake can be avoided by using a remote control. This model of camera can also be operated remotely using software on a computer or laptop. An HD TV or LED flat screen monitor can be used to assist with focusing, via an HDMI lead.
The closer one gets to the object, the harder microscopic imperfections are to avoid in the resulting images. Small blemishes can of course be taken out by photo editing software. If cost is an issue, old 'trial versions' of Paintshop Pro e.g. v4.12 are quite useful, and I know the version mentioned works well even on 64 bit operating systems, such as Microsoft Windows 7 Pro. The quality of seawater used is highly important, seawater must be allowed to settle, with cleaner water decanted off, but if the water is still found to be quite dirty, holding lots of particles in suspension, it must be filtered for use. Seawater can also be made up from aquarium salt purchased from a Tropical Fish supplier, but this may also need to be filtered to remove small particles from the water.
One thing that needs to be played with is ISO and the strength of flash used, the higher ISO used, the stronger the flash needed. Strong flashes can cause unwanted highlights, so a flash diffuser may need to be used. Purpose made diffusers can be expensive, it's just as easy to use layers of paper tape over the flash light/s. For the majority of images taken with flash I aim to use the camera in full manual, a shutter speed 1/200th of a second, aim to use an ISO of anywhere from 100 to 400 and set the flash unit as required. More flash is needed if dealing with a dark backgrounds or if shooting over a purposely placed black perspex background.
Calvadosia cruxmelitensis oral surface of bell close-up
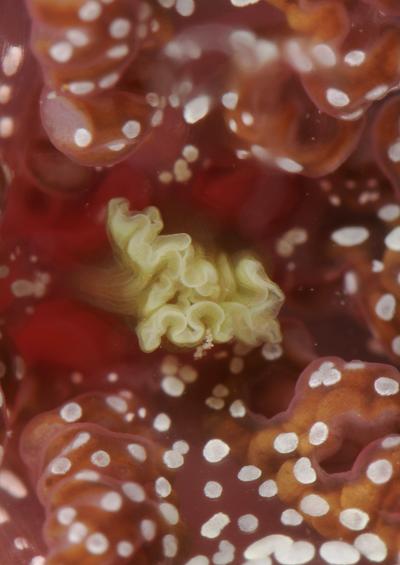
Calvadosia cruxmelitensis gonadal sacs close-up
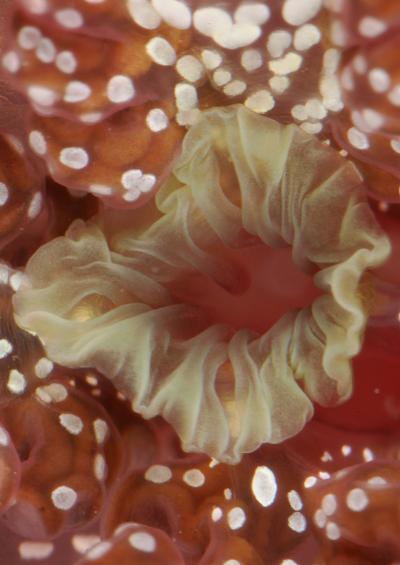
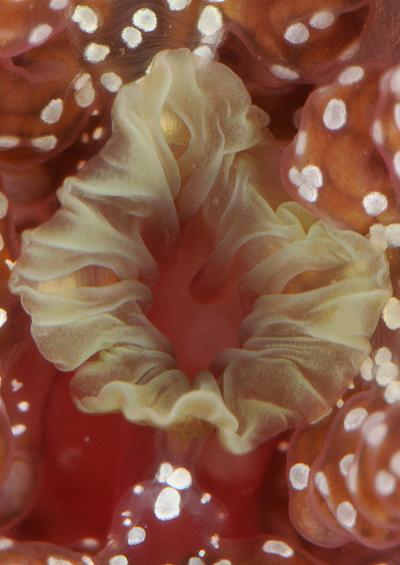
Calvadosia cruxmelitensis manubrium (mouth) closed
Calvadosia cruxmelitensis manubrium (mouth) open -1
Calvadosia cruxmelitensis manubrium (mouth) open -2
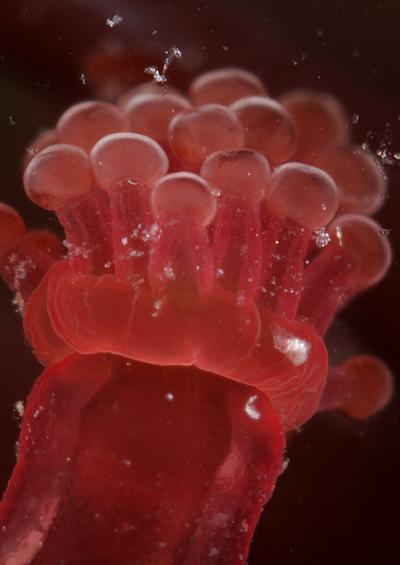
Calvadosia cruxmelitensis secondary tentacles -1
Calvadosia cruxmelitensis secondary tentacles -2
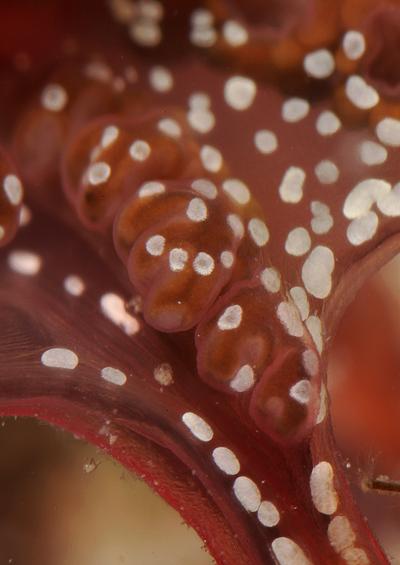
L. cruxmelitensis arm with nematocysts in parallel rows